Tag Archives: hiking

Itasca: The Original State Park

This month’s adventure took us to the Mississippi Headwaters, Itasca State Park! Itasca is known as the “Original State Park” and was founded in 1891.

Starting out in Itasca

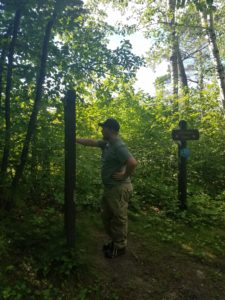
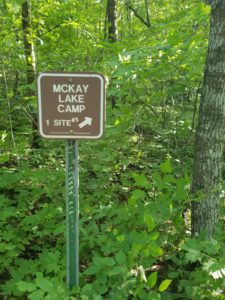
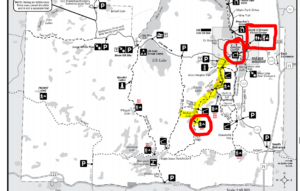
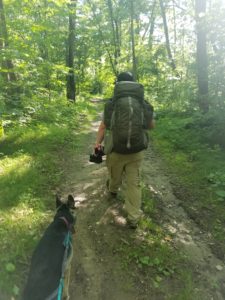
Itasca State Park is actually not too far from our home, about two hours. We missed the first entrance, but caught the second one and made our way to the Jacob V. Brower visitor center. Everyone who stays in one of the 45 overnight sites will check in here. Plan to stay and enjoy this visitor center that is packed with historical information, exhibits, pamphlets of the area, as well as a cute little gift shop. Once we checked in, we made our way down by Douglas Lodge, which is a full-service restaurant (this park has everything!) and parked in the lot off to the side. From there we made our trek which was between 3.5 to 4 miles down the Deer Park Trail, our destination was Back Pack Site 5 on McKay Lake.


The Campsite

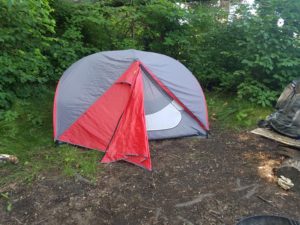
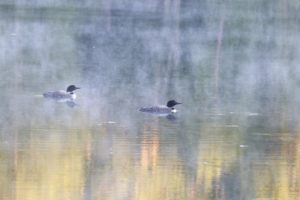
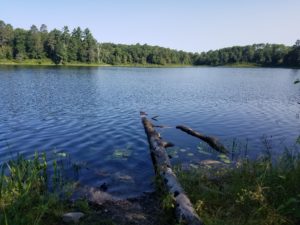
The hike to the site is moderate, you do go up and down a lot of hills. There are two shelters along the way and you also will pass the trail that will bring you to the fire tower, which is an attraction that draws a lot of people in (we had the pup so we did not break off course to see this). Once you get to site number five, you go into the woods a bit and there it is, your secluded oasis for your trip. I do mean secluded, it is the only campsite on all of McKay Lake, you will, however, have the company of loons, trumpeter swans, and some pelicans.
 Itasca

We stayed for one night and enjoyed really being alone with nature. There is a tiny “beach” on the campsite that the dog loved diving into, however, there were leeches so you have to be very careful and make sure to check between their toes. We called it a night decently early, and the loons could be heard calling all night.
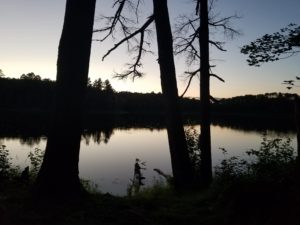
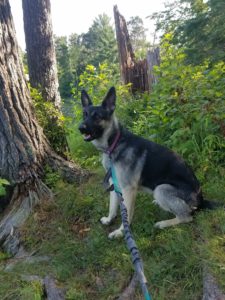


In the morning, we took a short hike around past McKay lake, made it back to camp and cooked up a quick breakfast. Then we were on our way to the other side of the sprawling, 32,000 acres park to the Mississippi Headwaters. We hiked back to the jeep and drove about 8 minutes to the Mary Gibbs Mississippi Headwaters Center. On the way, we did pass the Itasca Lake boat access which offers Kayak, paddle board, bike, canoe and other rentals.

The Headwaters

After passing a few historical sites in the park such as the Pioneer Cemetery and Preacher’s Grove, we came to a parking lot in front of a massive building, which is the Mary Gibbs Mississippi Headwaters Center. This visitor center has educational stops outside, a large gift shop with fresh fudge, as well as a cafeteria-style restaurant with hand scooped Blue Bunny ice cream. Once we made our way past all of these eye-catching things, you cross over a bridge and come to the Headwaters of the great Mississippi River.
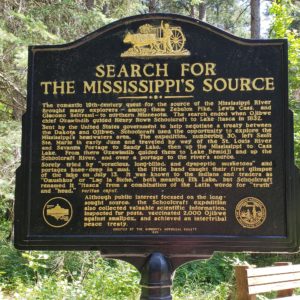
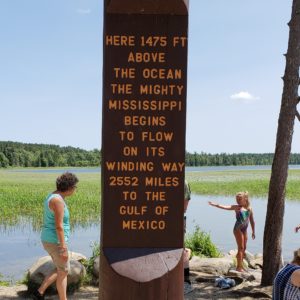
 

Itasca State Park is truly a wonder of Minnesota, and you can tell why it is one of the most popular! We were there for one day, and while I feel we did so much, there is still so much more to do there! Two more interpretive exhibits: Forest Inn and the Picnic Area Museum, I definitely need to climb the fire tower, I love to Kayak and of course, there is about 35 miles more of trails I haven’t seen (Dr.Roberts Interactive Trail is a must). We will definitely be making a few more trips back to this park, and hope you make it part of your #ExploreMinnesota adventure!


The 10 C’s of Survivability

We have already gone over the original 5 C’s of Survivability. Now we will cover the next 5 C’s that will better round out your kit. The 10 C’s of survivability are how I start off every kit or list of gear I need. Each piece of the 10 C’s kit is very important to have on you when out in the woods.

Candling Device – Having light can turn any situation into a much safer more relaxed environment. Being able to see what you are facing is huge in any situation and having the ability to have the sense of sight in a dark area makes basic movement that much easier. I usually always carry a flashlight on me whether it’s just a small one in my pocket or a much larger more powerful one in my pack or vehicle. One of the best options for in camp is a headlamp, wearing a headlamp allows you to light up whatever you are looking at while still having both hands free to perform task around camp.

Compass – Having a compass that points north and helps you find your escape route is very important. Just as important is knowing your area and having a plan so when things don’t go as planned you have a general direction to head to avoid major threats. knowing which direction the highway is or a major river makes the compass that much more of a tool to help aid you in self-help or self-rescue. Also, having a compass with a mirror and magnifying glass makes your compass a very versatile piece of kit.

Cotton – Having a cotton bandana is a very important and useful piece of kit. It can be used to help in first aid, filtering water, can be turned into char cloth, protects from the sun and the wind, and when wet it can be used to help cool you down on a hot day. There are tons of uses for a cotton bandana and the uses are extended if you choose to carry a shemagh which is basically the same thing only larger.

Cargo Tape – Having Cargo tape I prefer Gorilla Tape can aid you in many ways as well. It can help with repairs, help waterproof holes in tarps or clothes, can be broken down into a flammable tinder bundle, not to mention all the other things that can be made out of tape such as bowls and cups.

Canvas Needle – Having a sail needle doesn’t seem like a very important piece of kit to carry but it can perform in many different ways. Having a sharp sail needle can be used to help dig out slivers or splinters, it can also be used to punch holes in leather, or start a hole in a piece of wood to start carving out a bow drill set. If the needle is magnetized it can also be turned into a compass to help find your north/south line to help aid in finding your way back to camp.

Having all 10 C’s allows you to have all the tools needed to find your way, shelter in place, or safely navigate through the woods. So all of my kits Start with the 10 C’s which are Cutting, Combustion, Container, Cordage, Cover, Candling device, Compass, Cotton, Cargo tape, Canvas needle. These basic pieces of gear will help keep you safe and somewhat comfortable in the woods. also by having pieces that serves more than one purpose can help you that much more, such as a compass that also has a mirror.

OUTDOOR BUG PROTECTION?

With Tick and Mosquito season underway what are some of the things you use to keep them away what is your outdoor bug protection?

I start every season by treating all my clothes, tarps, tents, backpacks, and any other fabric with Sawyer Permethrin. The reason I like using Permethrin even tho it can not be used on skin is because it not only keeps Ticks, Chiggers, Mitts, and Mosquitos away it kills them on contact. I have watched a tick start to climb up my pants and was killed before it even made it to my knee. Plus it stays on your clothes through 6 loads of laundry so you don’t need to treat your clothes every time you go into the woods.

Second I always make sure to bring Sawyer Maxi-Deet this can be applied to the skin to help aid in keeping the Ticks, Chiggers, Mitts, and Mosquitos away in the first place. There is an ongoing joke that the MN state bird is the Mosquito, they can be very thick at times and being able to keep them away is key to keeping your sanity out in the woods. Plus the Ticks are known to carry Lymes disease and other illness so keeping them away is a must.

My Favorite Mora Knives

  1. Mora Companion – This was my first Mora and it has served me very well I can’t think of a better budget fix blade. I have the Carbon steel blade because it is able to strike sparks off the spine and can be used in many other ways. It does, however, come in a Stainless steel option.
  2. Mora Bushcraft Black – Once I got the bug, I had to get the Bushcraft Black. It is very similar to the Companion but with a more rubberized handle that I find to be a lot more comfortable. It also has a 90-degree spine which aids in scraping bark and striking a ferro rod.
  3. Mora Pro C – In one of my BattlBox I received the Mora Pro C it has a much different feel than the Companion but it still has that hard plastic handle. The handle is very comfortable and has a very nice hand guard to keep you from slipping onto the blade. The blade is Carbon steel and much shorter than the Companion. My plan was to give this knife to my young son as his first fixed blade but the more I use it the more I wanna keep it for myself.
  4. Mora Kansbol – This is one of Mora’s newer blades. I hope to one day get my hands on one and see how it compares to my Bushcraft Black.
  5. Mora Garberg – It wouldn’t be a Mora list if it didn’t include Mora’s first ever Full Tang knife. I would love to own one of these knives I can’t imagine what the engineering of this knife includes. They took everything good they have ever done to a Mora, wrapped it up into one package and then made it a full tang. The price shows that they didn’t skimp out on quality but like I said I would love to own one of these bad boys some day.

5 C Survival Kit

The 5 C’s of Survivability are 5 items that are the most helpful to have in any emergency. They are also the hardest to reproduce out of natural materials and burn the most calories to make. So by carrying them with you at all times, you will always find yourself in a much better state of well being no matter what might happen in the woods.

I will put them in order of how I feel they are most important.

  1. Cutting Tool – My cutting tool that I carry most often is a fixed blade knife whether it’s my BK9 or my Mora Bushcraft Black I always have a knife at my side. Some other options could include a macheteax, or a multitool.
  2. Combustion Device – Fire is very important in any situation it is a moral booster as well as a protector of bugs and other animals. It also lights up camp at night, keeps you warm on a cold day, and can be used for cooking or treating water. So haveing a reliable fire starter is one of the most important parts of your kit. I always carry a good old Bic lighter as well as a Ferro Rod along with some Wet Fire or Live Fire to make sure I can start and maintain a fire in most conditions.
  3. Container – Having a container that you can carry water over distance with as well as cook and treat water is a very important thing to keep in mind. I carry a stainless steel water bottle that I can use to not only carry water but I can place it in a fire to boil water for drinking or cooking anything I may find along the trail.
  4. Cordage – Having cordage or rope with you can help aid you in many tasks. It can tie logs together to make a raft, it can be used to help build shelter, you can make a tripod out of long sticks to help cook or smoke anything you find to eat. I always carry 550-paracord with me that I keep in my pack just for emergency purposes only. Other options would be Zing-it which still has a very strong tensile strength but is much lighter. Also, tarred bank line is used by many bushcrafters for the same reason.
  5. Cover – Having shelter from the elements is very important to staying healthy and safe when dealing with weather. The very first defense from weather is the clothes on your back. Always make sure to dress according to the conditions of the day ahead of you. Wearing a swimsuit in a snowstorm will make shelter building a very top priority over anything else. Making sure that not only are you dressed for the day ahead of you but also having something like a light coat or rain jacket can make a surprise rain seem like just another walk in the park. I try to always dress for the conditions, have a coat to help keep me dry or warm, plus I carry a space blanket that I can make a shelter out of and also keep me warm, safe, and dry.

The 5 C’s was a system made up by Dave Canterbury. All of my kits have a minimum of the 5 C’s Dave has also added 5 more C’s to round out a 10 piece kit that will aid you even further. I will be adding those 5 C’s in another post so stay tuned for future posts.

Water Filter

My favorite water filters.

  1. Sawyer mini – I have used the Sawyer Mini for years and find it works really well. It is small light weight and very easy to use. The thing I like most about it is that you can drink straight from the filter or you can squeeze the water into a separate container allowing you to carry more clean water with you as you go.
  2. Berkey GSPRT water bottle – This is a water bottle with a built-in filter this allows you to fill the bottle with any water from anywhere and simply drink like you would out of a standard straw that you find in most sports water bottles. This makes it super simple to use and fast to get what you need and keep moving.
  3. Sawyer Squeeze – I have not used the Sawyer squeeze which is the Mini’s bigger option. I have heard from many people that the flow rate on the Squeeze is much better and it can filter a ton more water than the mini. However, I feel the Mini serves me well and don’t plan to buy a Squeeze now that I have the Mini.
  4. Sawyer Products Personal Water Bottle Filter – Like the Berkey this is a standard water bottle that you just fill and go. It is very quick and easy to use allowing anyone, even your children to filter water and not slow them down.