Tag Archives: preparedness

Dog Emergency Preparedness

It is important to be prepared for whatever may come. This could be inclement weather, injury, food shortages, and many other unknowns. While we may prepare for ourselves, what about our furry friends? Today I’m going to share with you, things I do to be prepped for my dog and whatever comes our way.

Stockpiling Food and Treats

Food security is something that I am very passionate about. This goes for not only my human family but our dog as well. I make sure to always have about three months of food and treats. There are two ways that I save on dog food to ensure I have a stockpile while maintaining my budget. Firstly, is that I have a loyalty membership through PetCo and set up a reoccurring delivery. With reoccurring delivery, there is a 5% discount, combine that with my loyalty membership and every 8th bag of dog food is free. Secondly, is to check for sales. The dog food brand we use regularly goes on a “truckload” price at a local store, I make sure to keep an eye out for this sale and will pick up a few bags.  Subscribe and Save with Amazon is a huge win for stockpiling treats as well.

Water

On the note of food, we should also think about how will we give water to our dogs? Again, you will need to know how much your dog consumes. My dog drinks about a gallon a day, this means I need to find space for all those jugs or another storage option. I do have plastic gallons on hand in the event of an emergency, but a water filter is a great option that does not take up much space.

Variety of Leads

There are many situations in which having a lead for your dog is necessary. Therefore it is important to have a variety of leads to fit these different situations. For example, in our city limits, this means you need a tie-out if unable to get fencing. We also have a 50ft lead that is bright orange for when having our dog out in the woods with us. A slip lead is great when you need to maintain good control of your dog, and also can be utilized for everyday walks. The final type of lead we use is a hands-free lead. This type of lead has a waist belt and is great for when you are exercising with your dog.


First Aid kit

First aid is necessary and I have already written an article on first aid kits for dogs, including the one I put together, that you can check out here. It’s nice not to need a first aid kit, but it’s amazing to have one when you do need it. Make sure you have one for home and for travel because you just never know. I’m going to throw in grooming supplies here as well because grooming keeps your dog healthy. A nail trimmer is going to help keep your dog comfortable by keeping their nails from getting overgrown. A brush to groom out any extra fur to keep your dog from getting matted and overheated. Thirdly for grooming, pet wipes to give them an in-between bath and help if they get into anything messy.


Emergency Plans

Preparing for emergencies means practicing how you are going to handle these situations. For example, if there is a tornado, where is the safe place to take cover? Can you bring your dog to that safe place? Have you practiced with your dog to help ensure things go smoothly in a stressful situation? You can come up with plans and ask questions for many different scenarios including fires, SHTF, any type of storm, and many other scenarios.

Prepping for the unknowns and what-ifs should be an important part of our lives, just like our dogs are. They are family, so being prepared to take care of them in an emergency brings comfort to us. Let me know what you do to be prepared for your dog in an emergency!


Canning for the First Time – What I Wish I’d had.

Today was my first time canning. I’m going to share with you what I wish I had for this adventure.

The Decision to Can

I made pepper jelly and canned it today. I have never canned anything in my life, nor have I ever made jelly! Dehydrating – yes, but canning – no! Christmas is upon us though, and nothing feels better to give than something you made yourself. To say I was unprepared would be an understatement, ha. I’m going to share my experience, and then share somethings that I wish I had had to make my first time canning easier.

This whole jelly project started with a game our family plays for Christmas, and we always play a round where the gifts up for grabs are homemade.  I’ve always wanted to can, but never really had a reason. Also,  I really don’t know too much about it.  The family likes pepper jelly with cream cheese and crackers though, so I thought “Heck, let’s go all-in!”

I picked up a box of Mrs.Wages pepper jelly kit, which seemed like the easiest route to introduce myself to canning.

Picking Up Ingredients

At my local grocery store, I picked up 8 green bell peppers and 2 beautiful, red bell peppers. I figured I had everything else at home. Fast forward to this morning, I wake up, super pumped to make this jelly. I start chopping the peppers and throw them in my food processor (which I had luckily just received or I’m not sure what I would’ve done, ha.) Everything is going well until I need to strain the juice from the pepper puree. Cheesecloth is not something I have at home, and paper towels would soak up too much of the juice. Kory saved the day with a bandana and I was able to get my 5 cups of juice! Cheesecloth is definitely something I will be keeping on hand from now on.

Now I’m at the part where I am supposed to be adding the lemon juice, vinegar, and packets from the Mrs.Wages kit. Vinegar…where is my vinegar?! I could’ve sworn I had some, after looking high and low I was clearly out. So, another run to the grocery store. I pick up beef sticks while I’m there, to make sure I have the strength to get through this.

I’m Actually Canning

Finally, I can really get started. I add my pepper juice, lemon juice, vinegar and the jelly packets to the saucepan and mix. Then I need to warm up my jars, so I make a small water bath in my largest stockpot. While my stockpot did work for this, a canner would be a better fit. Because a canner can hold more water and come with a jar rack. Jar racks are for keeping the jars off the bottom of the pot where the most direct heat is.  Keep jars away from direct heat so they don’t accidentally shatter from getting too hot.


I get my first 5 jars (my stockpot only held 5 half-pints at a time) into the hot water with my trusty tongs and boil for five minutes. Using tongs was definitely tricky and I was wishing I had a jar lifter. Jar lifters are created to get jars in and out of hot water safely. Using tongs is something I will NEVER do again, and I’m sure my hands will thank me.


Success

I was pleasantly surprised that after all of this, my lids SEALED! As a result, I successfully canned my first batch of anything. As I am sharing my ordeal with you, my first batch of pepper jelly is coming to room temperature and 24 hours from now should be ready to eat. I am officially a canner.

I hope you laughed a little with me and enjoyed these tips I wish I had known. Please make sure to come back for future canning adventures with me!

How to Start a Food Stockpile

So You Want to Start a Food Stockpile?

How to start a food stockpile has been a big question lately. With the weather doing crazy things it has people thinking about “doomsday” and how they can better prepare themselves. One of the best ways to prepare for a situation like that is to be ready to hunker down, this includes having a good stockpile of food. A good stockpile of food doesn’t just mean having a large quantity of food (even though that is part of it.) Having a good stockpile means having food that you eat on a normal basis, is delicious raising morale when it’s low, and foods that are easy to prepare.

Building a Stockpile

Where to start:

When starting a food stockpile it will take some time and preparation. The first place to look when you start a food stockpile is your very own pantry. Looking in your pantry can help you see what food is part of your diet in everyday life. This way of stocking up has three huge benefits:

  1. Having things you eat regularly helps you rotate through your stockpile so that nothing spoils. This prevents you from wasting food AND money!
  2. It is easy to prepare these items as you are familiar with them and use them on a semi-regular basis. For example, if you have rice kept on hand, chances are you have multiple recipes where rice is an ingredient. This saves time because you know how to prepare it and gives you a little variety as you are able to swap out recipes.
  3. It builds morale! Food often carries a sense of nostalgia and good memories for us. Having food that is associated with good times just gives an extra boost of positivity on days when it is really hard to think of going forward. Not to mention, that when you eat something that tastes SO good, you just feel good too!


How to Stockpile:

Now that you have a list of food that you keep on hand at all times, you can start shopping for these items. This can be very overwhelming and can be very expensive if you just jump in all at once, you can take the stress off of starting your food stockpile by breaking it down into sections – this helps allow you to shop for the best deal as well!

A basic breakdown of categories to help you build your food stockpile would be:

  • Canned veggies
  • Rice and Pasta
  • Canned fruit
  • Sauces
  • Canned meat

You can absolutely adjust this to whatever your preference or needs are. Once you have the categories you can shop the sales!

There are four ways to get the most for your dollar when starting your food stockpile and maintaining it from there:

  1. Shop sales! Seriously, get to know your local variety of grocery stores and their weekly ads! You can generally figure out the rotation of when they will have different categories on sale, it is usually a six-week rotation. The items that are advertised in the weekly ads are “loss leaders,” which are to get you in the store to buy other items while you are there. If you have a very strict budget STICK to your list and just pick up the items of the ad for your stockpile.
  2. Coupons! Coupons are so much more than just the clip from the newspaper kind these days. While those are great, most stores have their own apps these days loaded with virtual savings. You can stack these with paper coupons as well if you get the chance. Coupon apps are great to watch before and after holidays especially. A couple of days after Easter I was able to score hams for $1 per pound thanks to Target’s Cartwheel app, and now we have those saved in the freezer.
  3. Another great place to catch deals for your stockpile is the store’s grocery clearance and less than perfect product section. Many stores will mark down items for at least 30% when the packaging is damaged. This can add up to great savings for you. Just check over the product and make sure that you are comfortable with eating the food inside the packaging. An example of this is that not everyone is comfortable with dented cans, they don’t bother me so I ended up with a 6pack at .25 cents a can! You can also get steep discounts when a store is discontinuing a product so make sure to check for clearance!
  4. Last but not least is the good old dollar store! They are a great place to pick up canned food as well as pasta, rice, and other longterm storage foods!


Specialty Items

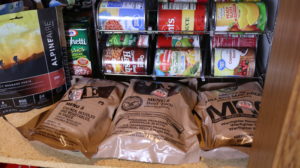
The last thing to touch on when talking about starting a food stockpile is specialty items. Specialty items are your Mountain House, Backpacker’s Pantry and other freeze-dried meals as well as options like MREs. These tend to be spendier options than your average food. I like to just keep a few of our favorite varieties on hand for every once in a while.  By making them a supplement to your food stockpile and not the bulk of it, it allows you to watch for sales and again clearance at sporting good stores and online retailers, making them much more affordable. For MREs I watch for deals on Amazon. I do this for freeze-dried meals as well, but I also look in brick and mortar stores for clearance when a new season is coming and the camping gear is resetting, making them much more budget friendly.

These are my tips to help you with starting a food stockpile, I hope they helped you out! Make sure you share any tips you have for starting and maintaining a food stockpile in the comment section below. I love to hear from you!


how to start a food stockpile